Hypno is capable of broadcasting NDI video from its front micro USB port. This allows you to capture, stream and monitor Hypno’s output directly on a PC without additional hardware. That video input can also be routed into OBS, a popular open-source video recording and live streaming program. Follow this guide to set up Hypno with Windows, NDI Tools, and finally OBS.
Items needed:
- PC running Windows 10 (Windows 7 untested for now but should work ok)
- Supplied microUSB cable (after market cables may cause power issues if length > 6 ft)
- Hypno
- Eurorack power supply or USB power supply (optional)
Software needed:
- NDI Tools - NDI Tools | NDI.tv (requires email)
- RNDIS driver - https://modclouddownloadprod.blob.core.windows.net/shared/mod-rndis-driver-windows.zip
- OBS - Download | OBS
- OBS NDI plugin (for Windows) - obs-ndi - NewTek NDI™ integration into OBS Studio | OBS Forums
Setting up and testing your NDI connection:
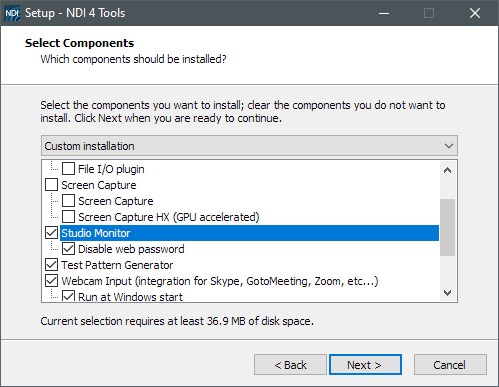
- Install NDI Tools, make sure to check the box for Studio Monitor in the installation configuration!
- Connect Hypno to your PC using a microUSB cable from the front USB port and allow Windows to automatically install drivers
*On some systems it is necessary to install the RNDIS driver. Please follow this detailed guide: Troubleshooting Windows Connection - MOD Wiki - Reboot your PC
- Open NDI Tools “Studio Monitor”
- Click the top left hamburger menu and select Hypno:main
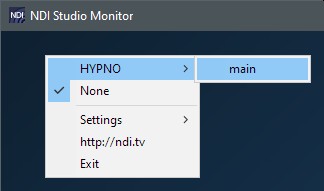
- Hypno should now be viewable from Studio Monitor
If you’re unable to view Hypno in Studio Monitor or complete the initial connection/installation, you can attempt the following steps:
- Some USB ports may not deliver enough power for Hypno to run on alone. Try connecting Hypno to a power source, such as the Eurorack power header or the side USB port.
- Swap for another microUSB cable & make sure the power supplying cable is less than 6ft. (longer cables cause voltage drops)
- Try installing the RNDIS driver if you have not already done so Troubleshooting Windows Connection - MOD Wiki
- VPNs may cause issues, disabling them can resolve connectivity problems.
- In some cases, disabling Windows Defender Firewall for Public Networks resolved connectivity issues. Not recommended when connected to public Wi-Fi networks (school, work, coffee shop).
Setting up OBS to use Hypno’s NDI video source
- Complete and verify NDI setup above
- Install the latest version of OBS from www.obsproject.com/download (tested working with 26.1.1 as of writing)
- Install the latest version of obs-ndi plugin from obs-ndi - NewTek NDI™ integration into OBS Studio | OBS Forums (testing working with 4.9.1 as of this writing)
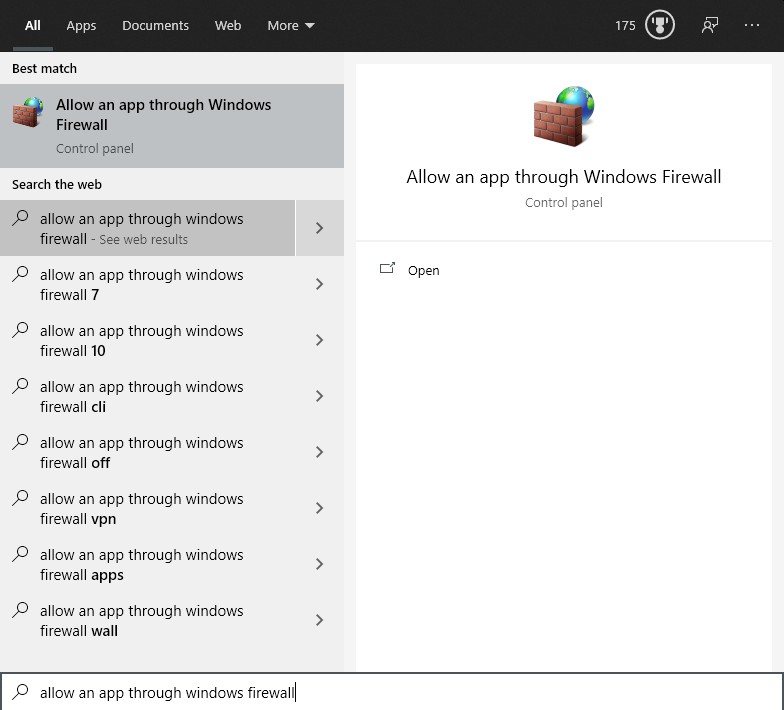
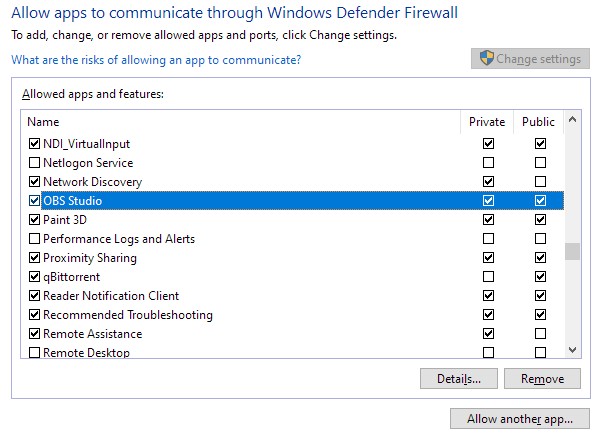
- Next we need to access the individual firewall permissions in Windows through the Start menu
- Look for OBS in the list of applications. If “Public” is unchecked next to OBS, click on “Change Settings” and then check the box. Now click OK.
- Open OBS
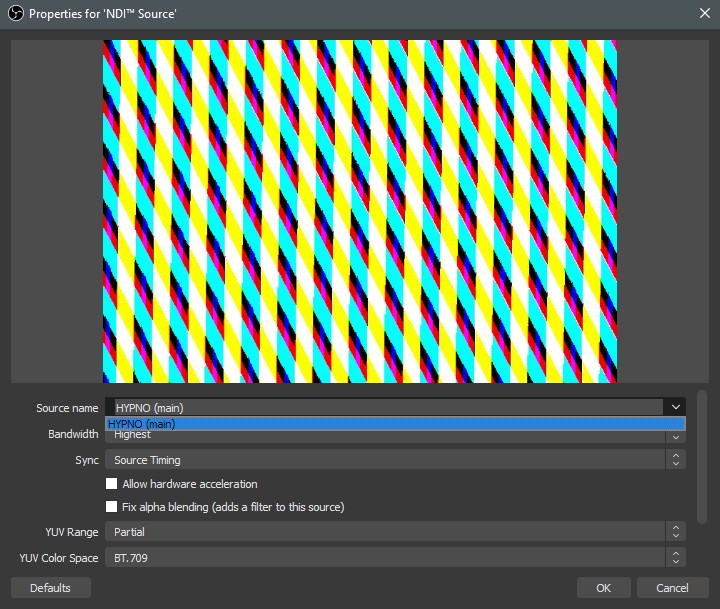
- When adding a new video source, “NDI Source” is now available
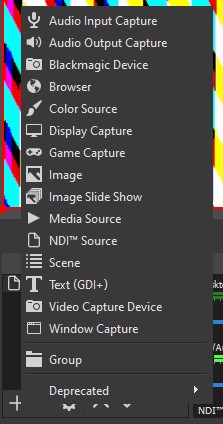
- After it’s been added, double-click on the NDI Source in the Sources box to bring up the device options. Select HYPNO (main).
- Press OK. Hypno should now be viewable in your main output window.
If you have issues using Hypno over NDI in OBS on Windows after following this guide, please bump this thread with a comment! You can also contribute to this thread by sharing your experiences with making OBS and Hypno work together.
Quick tips for OBS and Hypno
- With no HDMI output connected, Hypno will output 720x480 over NDI. If the HDMI is connected, the NDI output resolution will match the resolution of the HDMI output.
- You can configure OBS to capture Hypno’s output to any resolution you like in the settings.
- Use the Transform right-click menu to flip, stretch, fit, rotate and center your image.
- Experiment with filters from the right-click menu to apply color correction, sharpening, or use masks and keys.
- Use OBS Virtualcam to send OBS’ output to other recording or processing programs that do not accept NDI OBS Virtualcam | OBS Forums
- Use NDI virtual input (part of NDI tools) to put Hypno directly into any application that supports webcam input.
Please Note
Hypno Kit built with a Raspberry Pi 4 will not initialize NDI unless an HDMI cable is connected and transmitting signal when the Hypno is powered on.
